Assigning Documents to Users
When you need your colleagues to complete any action for a document, you can assign the document to one or multiple users, creating a document review task for them. In the task, you can provide details of what is required, when this action is due, prioritize this task or specify which matter stage this action is required for.
 Users can view all matter tasks grouped by assignee, priority, stage or current status on the matter Tasks page.
 When assigning a document, you can choose one or multiple users for a single document review task (once any assignee completes that task, it will be completed for all users assigned) or multiple tasks for each user (a task will be created for each user individually, so they can update their task without affecting tasks of other users).
Follow the steps below to assign a document to one or multiple users or create multiple document review tasks.
 Document review tasks will only be created following the steps in this guide. If you are creating a standard task on a document without using the Assignee column, this task will only show on the Tasks page of your To-do list.
Assigning Document to Users
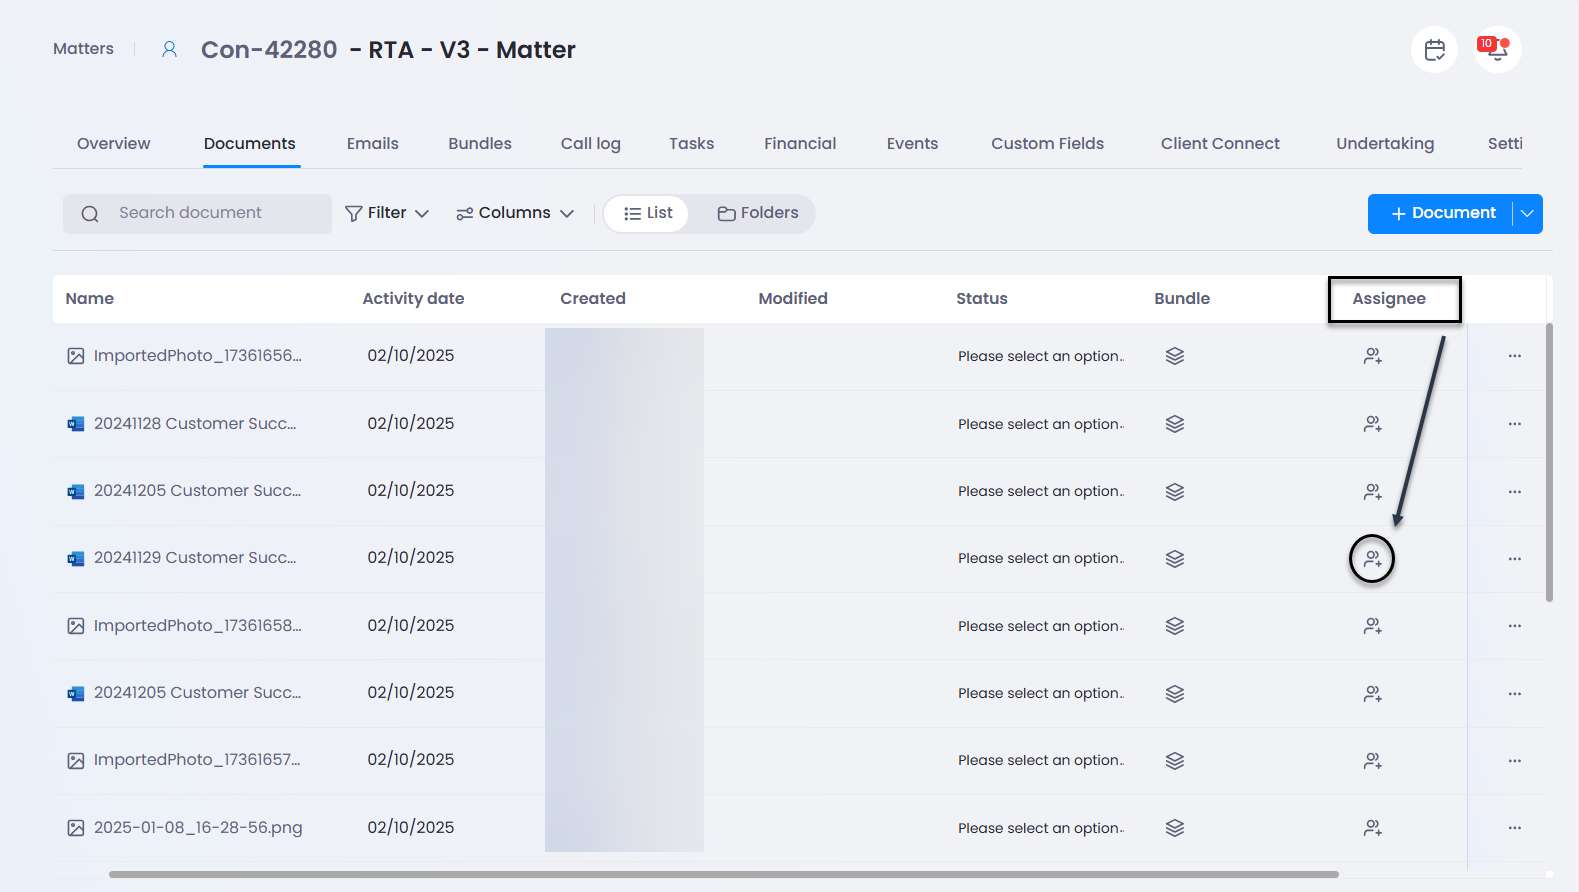
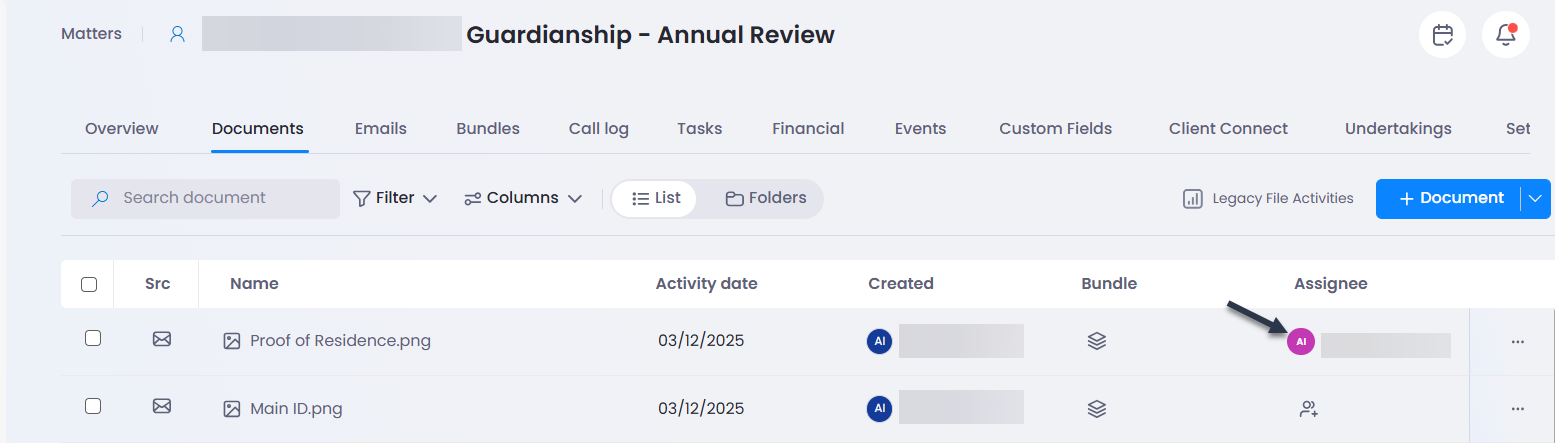
When in the relevant matter, click on the Documents tab, and under the Assignee column, click the User icon for the document that you want to assign.
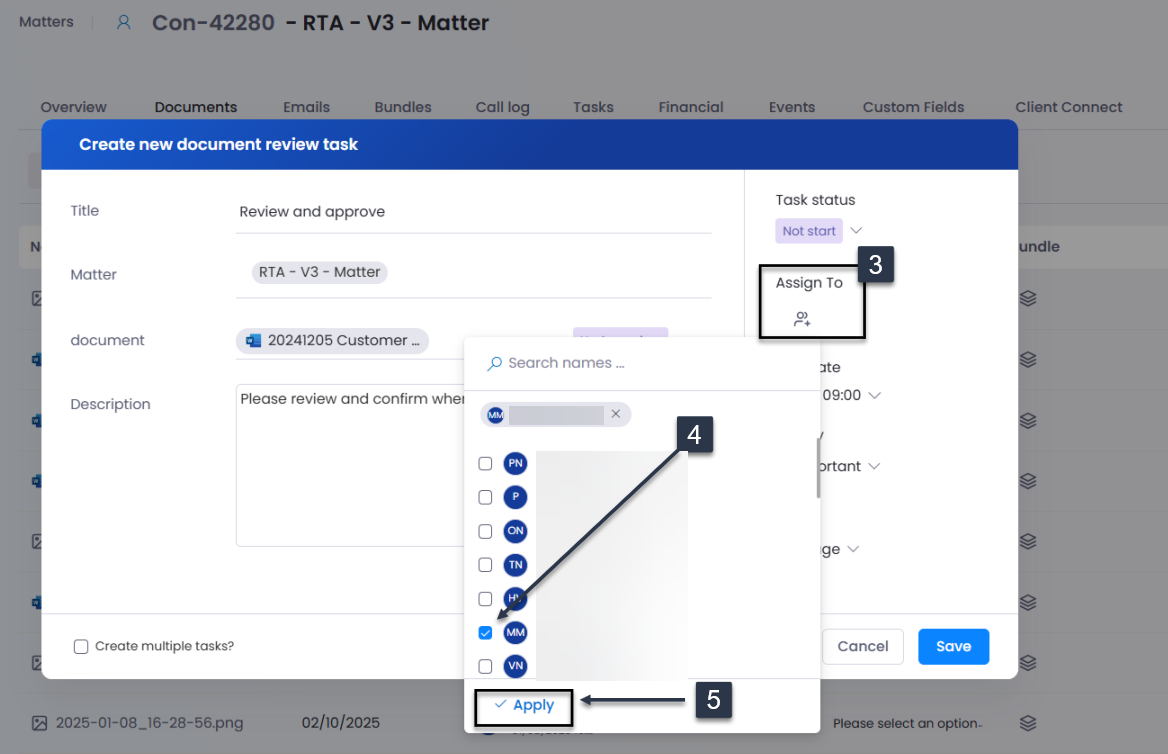
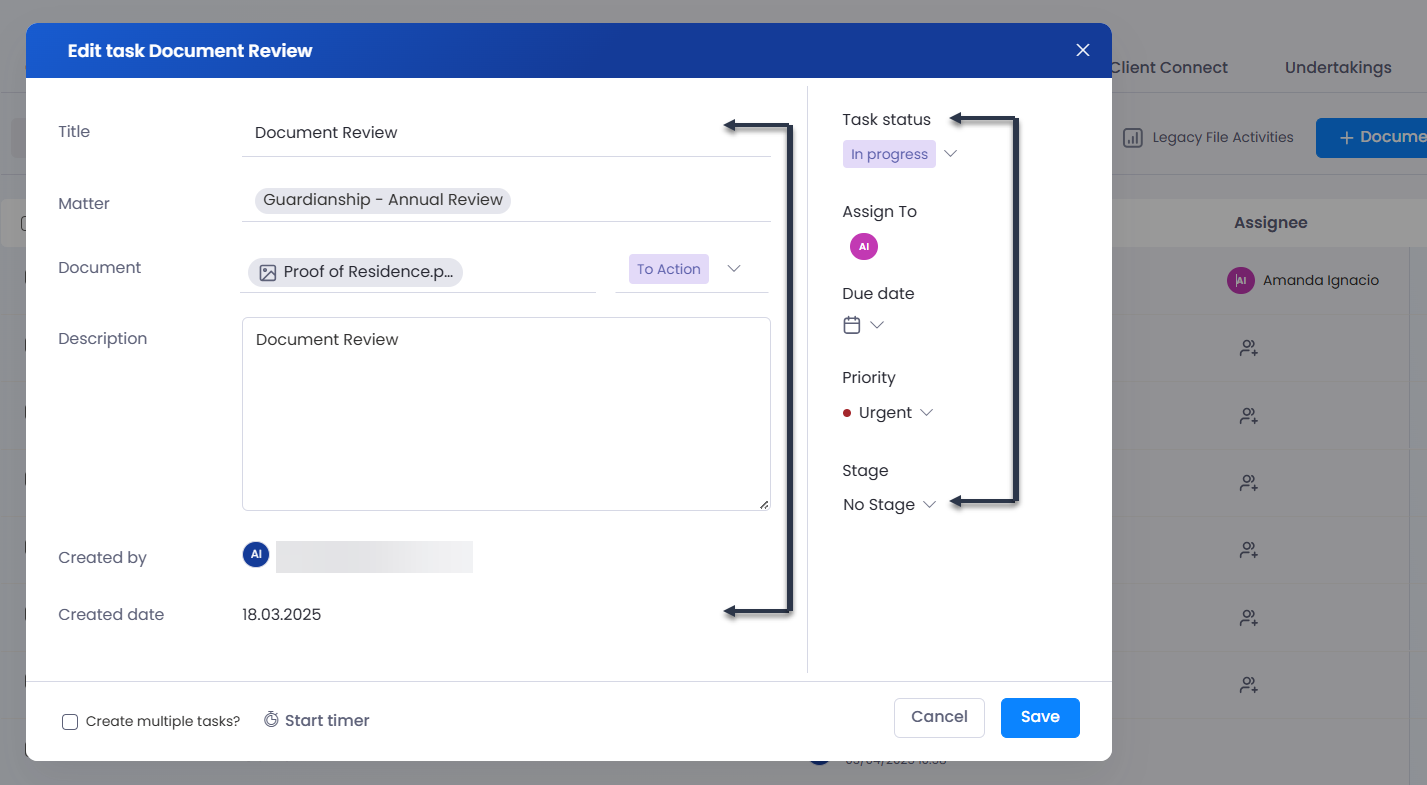
A pop-up will open where you can fill in all the necessary details for this document review task.
1 & 2 - You can specify the following:
Title - what the user needs to do for the document
Due date – date and time when this task is due
Priority - indicates the importance if the task should be actioned immediately or it can take time
Stage - assign a matter stage that the task belongs to, if relevant
(e.g. if the task is relevant to the Contract review stage of a matter)
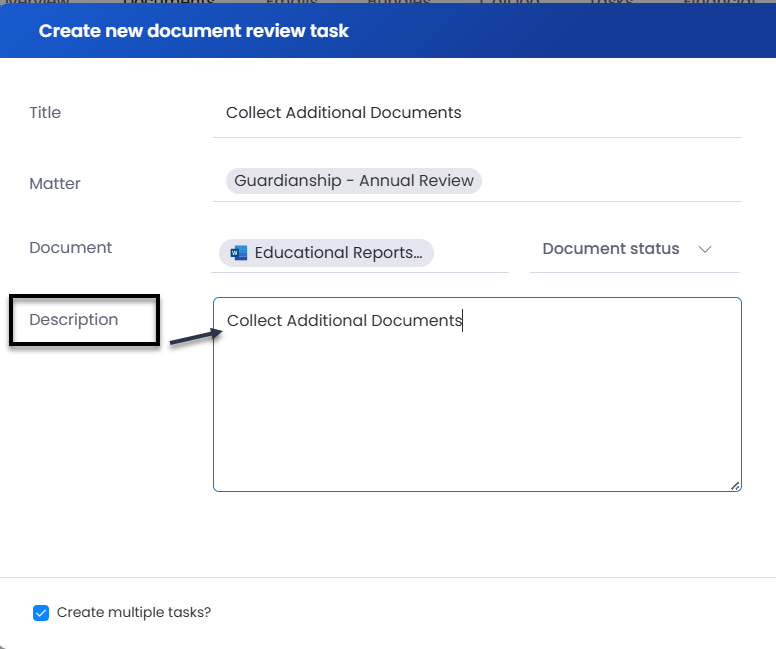
Description – add more details about what needs to be done, if needed
3, 4, 5 - Choose one relevant user or multiple users from the Assign to list and click Apply.
Once you have entered all details, click Save.
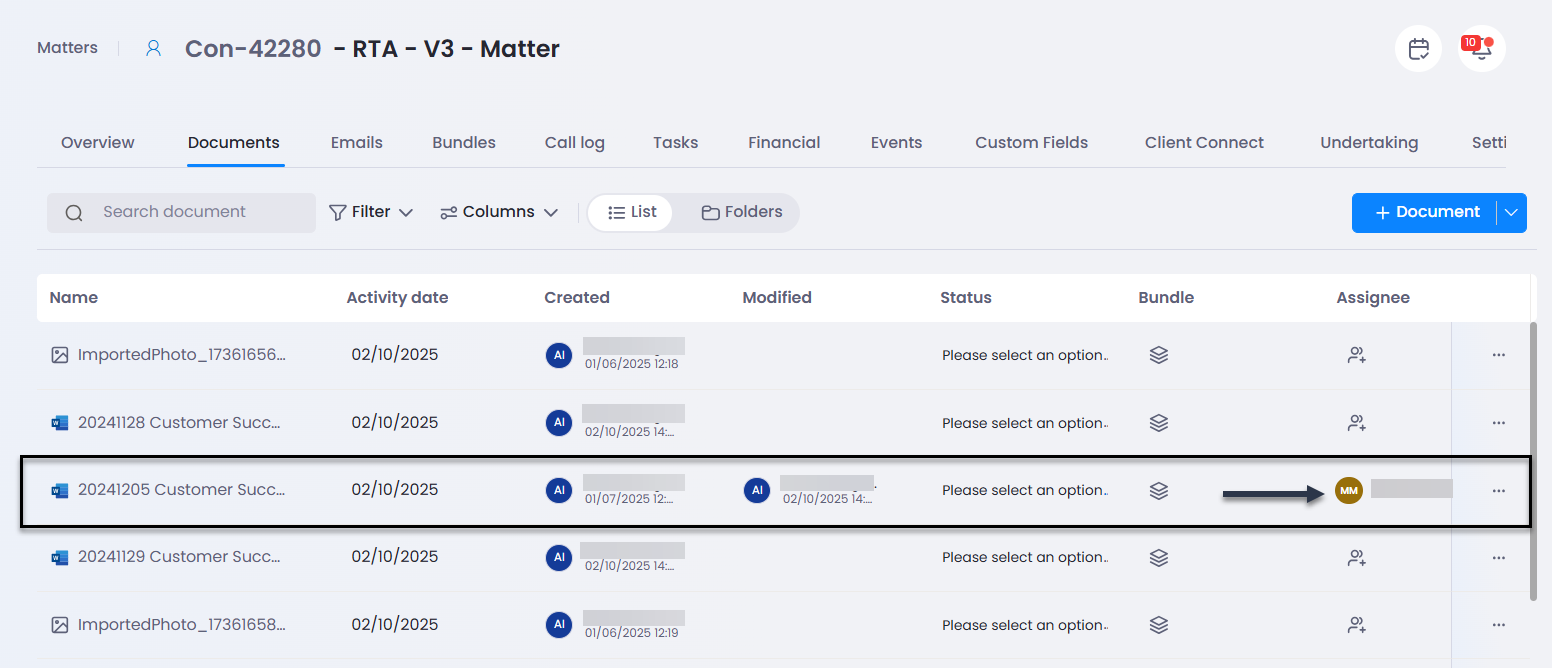
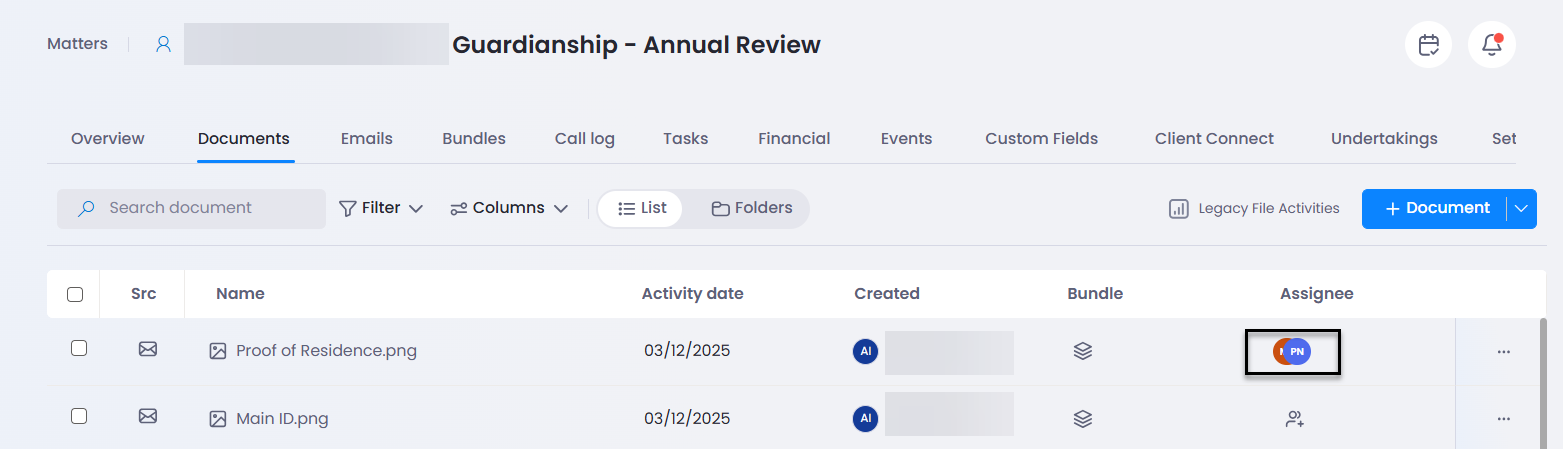
The Assignee column should now show the selected User name (or initials if multiple users assigned).
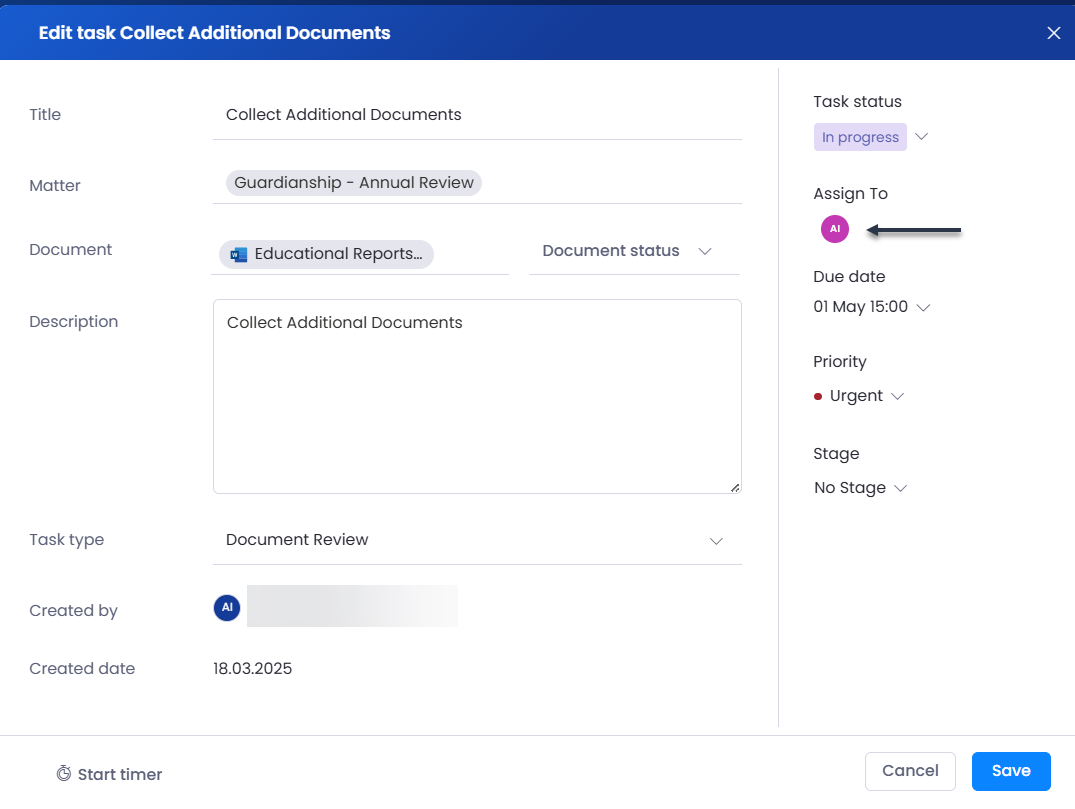
When you click on the assignee name,
the existing task assigned to the user will open where you can see the current task details and make any changes needed.
the existing task assigned to the user will open where you can see the current task details and make any changes needed.
 The user will get the email notification for the task assigned to them, and they would also see it in the Document review tab within their To-do list. All tasks linked to the matter are also visible on the matter Tasks page.
 If you don't want to assign a document to a user, but instead only want to create a task with the link to that document in the task, you can use Create task option instead.
Assign multiple documents for review
Select multiple documents in a matter, and assign to user(s) for review at once:
Select up to 20 documents at a time. Selected documents cannot have existing open document review tasks.
Task Title - Document review tasks will be created with task subject Review: [Document Name] - Document name will be auto-populated with the selected document name on each task. Should you choose to edit the task title, the edited title will apply to all document review tasks created.
All other task options will apply to all document review tasks created - task status, document status, assignees, priority, stage and description.
When assigning to multiple users, each document review task will be assigned to all those users. (E.g. If 3 documents were assigned to Mary and Joe, 3 document review tasks will be created and all 3 will be assigned to both Mary and Joe.)
You can also tick 'Create multiple tasks' if you would prefer that each assignee has a separate document review task from other assignees. (E.g. If 'Create multiple tasks' is ticked, Mary will have her 3 document review tasks, and Joe will have his 3 document review tasks with total 6 tasks being created.)

To find out more, go to Document Review.
Adding Assignees to existing Document Review Task
From the matter Documents page, you can add assignees to the existing task by clicking on the existing user avatar in the Assignee column.
Once the pop-up window appears, click on the existing user under Assign To.
Choose the additional User you would like the task to be assigned to as well.
Click on Apply.
Choose the additional User you would like the task to be assigned to as well.
Click on Apply.
Once multiple users are assigned to a task, it should now show multiple user avatars in the Assignee column of the document.

Creating multiple tasks
When you need to assign a document to multiple users separately, you can do this quickly by following above steps to assign a document and tick the 'Create multiple tasks'.
1.Tick ‘Create multiple tasks’ in the new document review task window
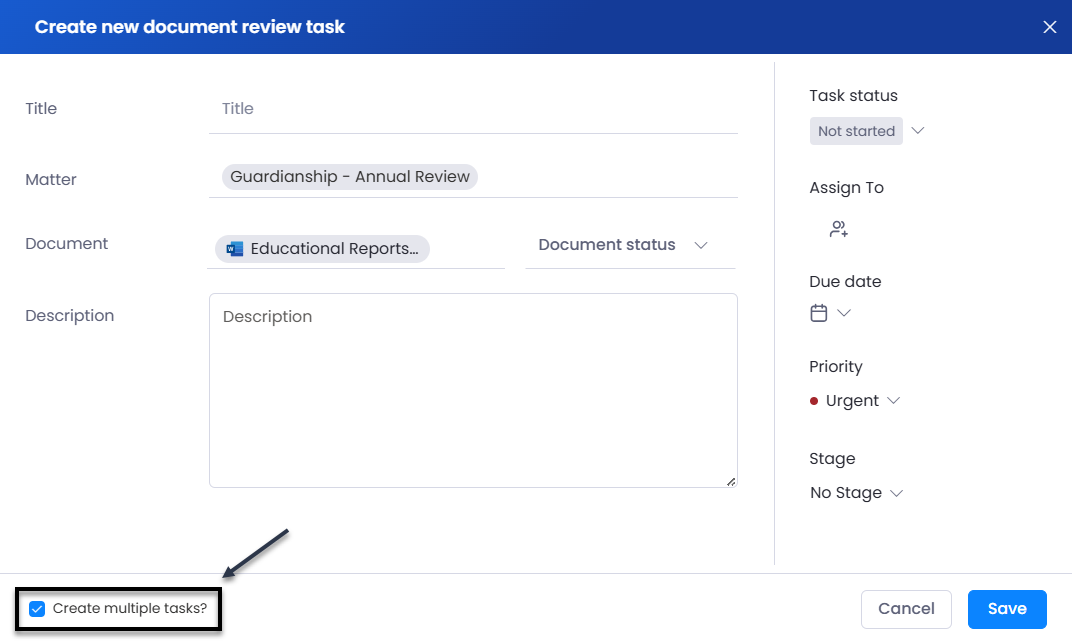
2. All task details entered will duplicate on each task for each user
3. After creating a multiple task and assigning it to multiple users, it should now show multiple avatars in the assignee under the document.
When you click on assignees you will see links to all those tasks for each user
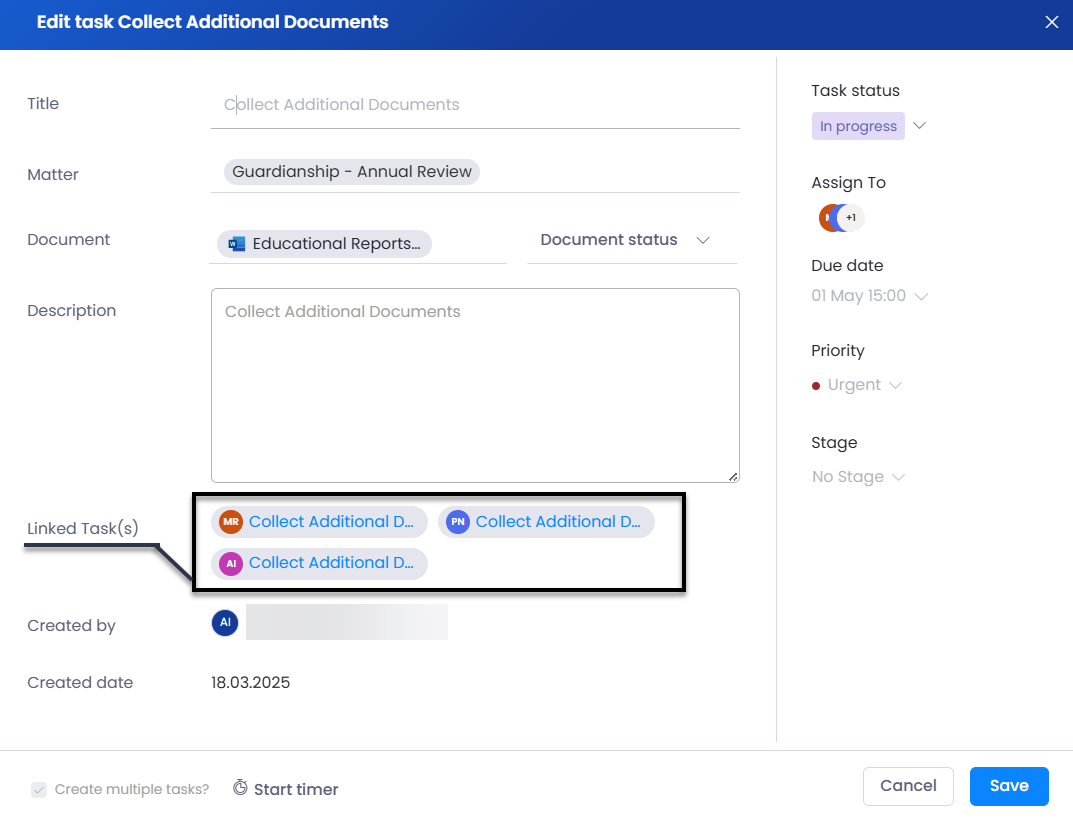
4. Each user can click on their own task link and can only update their own task on their end. You will also see just your Avatar when you click on your own link.
5. When a user marks their task as completed, their name will be removed from the assignees list on Documents page and the Task link will no longer be visible. While other user’s names will still show if their task is not completed yet.

2. All task details entered will duplicate on each task for each user
3. After creating a multiple task and assigning it to multiple users, it should now show multiple avatars in the assignee under the document.
When you click on assignees you will see links to all those tasks for each user
4. Each user can click on their own task link and can only update their own task on their end. You will also see just your Avatar when you click on your own link.
5. When a user marks their task as completed, their name will be removed from the assignees list on Documents page and the Task link will no longer be visible. While other user’s names will still show if their task is not completed yet.
Find out more on Document reviews.
Related Articles
Scanned Items
Thread allows you to upload scanned items and assign them to matters, users, and contacts. Scanned documents can be viewed in the Scanned Items tab of your Thread page. You can also have the scanned items sync automatically from your scanner by ...Client Connect - Sharing Documents with Customers
With Client Connect, Thread users can now share matter documents with their customers and allow customers to upload any documents directly to a matter. Sharing Documents with Customers 1. Go to Client Connect within the matter. 2. Under ...Viewing Documents Uploaded by Customer via Client Connect
When a customer uploads a document to the portal, it will appear within the Documents section under Client Connect tab, as well as within the Documents of the matter. To view the uploaded document(s) from the customer: 1. Click on Client Connect. ...Pinning Documents
Pin any document(s) to the top of your Documents page by right click or using three dots menu on a document, then choose Pin under Additional actions. Follow same steps to unpin a document. Pinned documents will show in a green highlighted row at the ...Contact Documents
You may need to add documents, such as a passport, medical records, or a driver’s license to a contact on Thread. This can be done at any stage through the Contacts tab. Uploading Contact Documents 1. Click Contacts, located in the left pane of your ...