Adding Outlook Emails and Attachments to Thread
With Thread’s Outlook add-in, you can easily save emails and email attachments to Thread directly from Outlook.
When saving an email, you can choose if you would like to only save the email, or if you wish to also save any email attachments as documents to the matter. You can also create a task for that email and/or attachment(s) directly while adding them to the matter.
Email saved using the Outlook add-in will show directly on the matter inbox along with all attachments in it, and if you choose to save attachments separately as well, those will show on the matter documents page.
Simply open the relevant email, and search for the matter you need to add it to.
1. When in the email, click on Thread for Email logo to open the add-in.
DESKTOP OUTLOOK
WEB OUTLOOK
2. To add an email to a matter, search for the matter you need to add this email to.

3. Once you selected the matter, Email & selected attachments option is ticked as default, and you can change this to Email only or Attachments only.
Email Only
If you choose Email Only, it saves the email to the matter inbox (Emails tab), and any attachments only within that email.
You can also enter the time type and time under Email Time Recording, to specify how long you have spent working on this email. This will save the time record to the matter Time tab, as well as in your daily time sheet.
Matter Time Tab
Daily Time Sheet
Attachments included on an email only option cannot be renamed as it will only save them within the email as they are currently.
If you would also like to create a task for the email, follow the steps here.Once you added an email to a matter, next time you open this email it will show in the add-in that this email is already added to a matter.
Email & Selected Attachments
Saves the email to the matter inbox (Emails tab) including any attachments within the email and also saves attachments to the Documents page of a matter.
Using the document options under the Attachments section, you can select the
1. Bundle section
2. Document type
3. Document folder - for all selected attachments.
You will be asked which Parent Folder you’d like to choose, type your folder name and save.
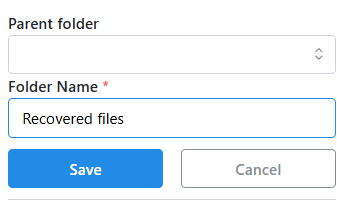
Your created folder should now show on the list of Folders and is automatically ticked.
Toggle the button showing Documents Only,
The button will now show OFF and you’ll see 'Attachments' instead of 'Documents Only'. This allows you to choose from any attachments or images within the email that you would like to save to the Documents tab in Thread.
You can either tick the 'All Attachments' box to select all, or manually choose from the list.
Attachments only
Only saves attachments to the Documents page of a matter.
At the bottom, you can choose which attachments you would like saved to matter documents.
The toggle button will show as “Document Only” if the button is toggled ON. This means only attachments you see showing as email attachments will be included to the matter, without any other email content (such as signature images, logo, facebook, Instagram and other icons on the email).
When the toggle button is OFF it will show as “All Attachments” . This allows you to also save any images showing in the email content as attachments to the matter. Just tick on the box/boxes of attachments you need to save.
You can also rename the chosen attachments to your liking by clicking on the attachment name. It will automatically apply the changes.

Once you have updated all document options click on Add to Matter to save the selected attachments to the matter.

Related Articles
Thread For Email Outlook Add In
Thread Outlook Office Add-in is a web-based add-in that can be instantly deployed by your Microsoft Global Administrator to all users within the company. There is no installation required on user devices. Any updates will be instantly applied. It is ...Attaching Thread Documents to Outlook Emails
With our Outlook Add-in, you can easily attach documents on Thread to any email sent from Outlook, saving you time downloading documents and uploading them from your desktop. Open your Outlook App. Click New Email in the top left pane. In the New ...Thread Starter Pack
THREAD SOFTWARE – ALL TOGETHER NOW Thread Legal User Guide Personal Customisation 1. Configuring Your Dashboard 2. Setting Your Thread Email Signature 3. Converting Email Attachments to PDF 4. Send Emails From Your Own Email Address 5. Default ...Navigating the Thread for Email Outlook add-in
The Thread for Email Outlook add-in helps users link their emails and attachments to Thread matters directly within Outlook to make it easier to manage and organize email correspondence and documents. In Thread, click on My Mail tab, or open the ...Viewing Historic Emails in Matter Documents
All historical emails initially found under the Activities Tab, will now be available under your Matter’s Documents List for your reference, while all emails you send or receive using the new Thread version will now be accessible under the Matter’s ...